
Kirill Gromov
Administrators
-
Joined
-
Last visited
Everything posted by Kirill Gromov
-
View File Checkout.com Payment Gateway Checkout.com - Process debit and credit card payments online, anywhere and access local payment methods through global payments platform. This gateway is a form of payment on the checkout.com side. How to set up! Submitter Kirill Gromov Submitted 10/17/23 Category Payment Gateways
-
No, Customization > Themes > Edit HTML and CSS
-
Unfortunately, we can’t help you then!
-
You can update the app to fix this.
-
You can attach the entire theme.
-
Hello. Open the template: Front > Boards > Card and find: <a href='#tmStatus_{$card->id}_menu' id='tmStatus_{$card->id}' data-card="{$card->id}" class='ipsType_light tmStatus' data-ipsMenu data-ipsMenu-appendTo="#cardItem_{$card->id}"> Change to: <a href='#tmStatus_{$card->id}_menu' id='tmStatus_{$card->id}' data-card="{$card->id}" class='ipsType_light tmStatus' data-ipsMenu data-ipsMenu-appendTo="body">
-
Hi, you can post the template here and we'll take a look at it.
-
Hello. Most likely, the remaining statuses go beyond the boards Wrap view. You need to scroll the board view to see the rest of the statuses. I think we will work on this in version 5 of the IPS.
-
 Paystack is the fastest, simplest way to start accepting online payments in South Africa. From signup to receiving real payments can take under 15 minutes. Seriously. Give your customers the gift of modern, frictionless, painless payments. Integrate Paystack once and let your customers pay you however they want. Card Bank Account Bank Transfer USSD Apple Pay Visa QR Mobile Money POS45.00 USD
 -
View File Paystack Payment Gateway Paystack is the fastest, simplest way to start accepting online payments in South Africa. From signup to receiving real payments can take under 15 minutes. Seriously. Give your customers the gift of modern, frictionless, painless payments. Integrate Paystack once and let your customers pay you however they want. Card Bank Account Bank Transfer USSD Apple Pay Visa QR Mobile Money POS Submitter Kirill Gromov Submitted 10/14/23 Category Payment Gateways
-
You need to review the changes made to the templates.
-
Hello. You should try on the default theme.
-
-
Hello. You can try now!
-
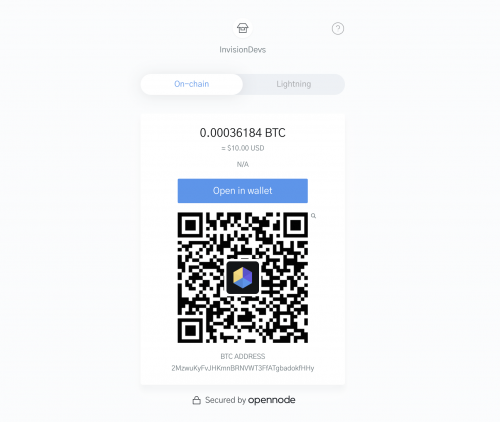 Bitcoin payments at the speed of now. Get lightning-fast, low-cost bitcoin payments and payouts for your business with our powerful API, ecommerce, plugins, or hosted payment pages. Accept bitcoin and receive bitcoin or local currencies like EUR, GBP, USD and more. OpenNode Payment Gateway for Invision Community.35.00 USD
 -
View File OpenNode Payment Gateway Bitcoin payments at the speed of now. Get lightning-fast, low-cost bitcoin payments and payouts for your business with our powerful API, ecommerce, plugins, or hosted payment pages. Accept bitcoin and receive bitcoin or local currencies like EUR, GBP, USD and more. OpenNode Payment Gateway for Invision Community. Submitter Kirill Gromov Submitted 10/06/23 Category Payment Gateways
-
 Receive payments instantly from anywhere around the world in ZAR with Visa and Mastercard issued credit and cheque cards. We process local and international credit card payments with a variety of fraud protection mechanisms in place to minimise the risk of chargebacks. PayFast Payment Gateway for Invision Community45.00 USD
 -
View File PayFast Payment Gateway Receive payments instantly from anywhere around the world in ZAR with Visa and Mastercard issued credit and cheque cards. We process local and international credit card payments with a variety of fraud protection mechanisms in place to minimise the risk of chargebacks. PayFast Payment Gateway for Invision Community Submitter Kirill Gromov Submitted 10/06/23 Category Payment Gateways
-
 With Mollie you can receive payments online and build your business wherever you want. Mollie Payment Gateway for Invision Community.45.00 USD
 -
View File Mollie Payment Gateway With Mollie you can receive payments online and build your business wherever you want. Mollie Payment Gateway for Invision Community. Submitter Kirill Gromov Submitted 10/05/23 Category Payment Gateways
-
 Klarna Payment Gateway lets you add Klarna as a payment method to your checkout on Invision Community. Integration works as Hosted Payment Page.45.00 USD
 -
View File Klarna Payment Gateway Klarna Payment Gateway lets you add Klarna as a payment method to your checkout on Invision Community. Integration works as Hosted Payment Page. Submitter Kirill Gromov Submitted 10/05/23 Category Payment Gateways
-
View File Rapyd Payment Gateway Rapyd Payment Gateway - Speed up the pay-up. Quickly start accepting cards, bank transfers, eWallets and cash worldwide. Accept credit cards, debit cards, bank transfers, eWallets and cash. Automatically give shoppers the ability to pay using the methods they know. Start accepting payments globally in a way that works for your business. Submitter Kirill Gromov Submitted 10/04/23 Category Payment Gateways
-
 Rapyd Payment Gateway - Speed up the pay-up. Quickly start accepting cards, bank transfers, eWallets and cash worldwide. Accept credit cards, debit cards, bank transfers, eWallets and cash. Automatically give shoppers the ability to pay using the methods they know. Start accepting payments globally in a way that works for your business.35.00 USD
 -
 The application will show search bots in the "Who's Online" widget. Settings: Bots Formatting. Display the number of sessions? Sorting settings. Formatting per bot. Based on a legacy plugin from siv1987Free