
Kirill Gromov
Administrators
-
Joined
-
Last visited
Everything posted by Kirill Gromov
-
 WalletOne is a payment service that has many payment methods, low commissions and a convenient merchant's office.Free
 -
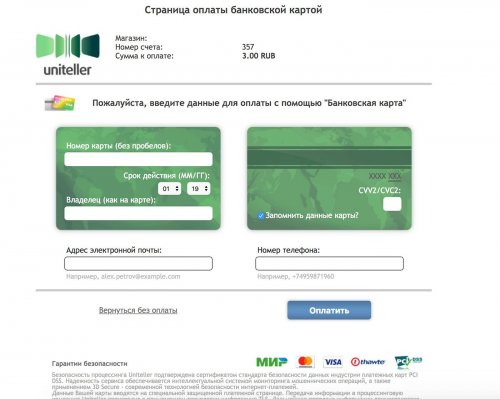 Uniteller Payment Gateway for Invision CommunityFree
 -
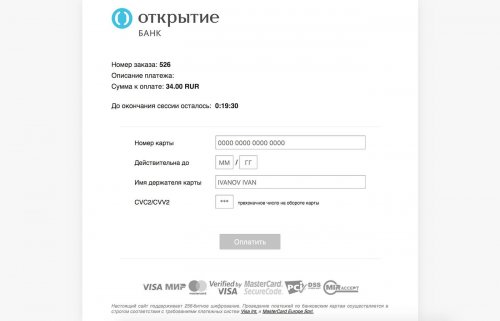 Payment for goods and services in Invision Community using the Internet acquiring of Otkritie Bank. Bank rate - 2.5% of turnover. Having connected, you get a personal account, statistics and analytics, branding of the payment page and other opportunities.Free
 -
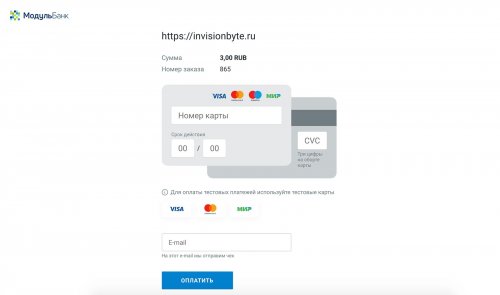 Accepting payments in Invision Community using Internet-acquiring of Modulbank Bank. The bank does not charge a service fee, the commission is only from purchases. If there are no purchases, internet-acquiring is free. The buyer enters the card data on the site, and the purchase is displayed in your personal account.Free
 -
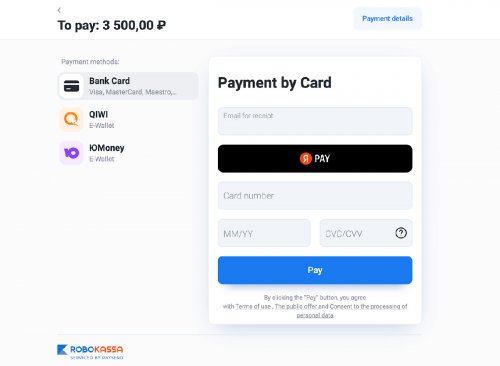 Robokassa Payment Gateway for Invision Community.Free
 -
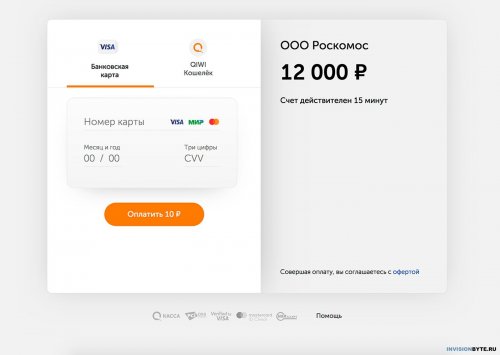 Accepting payments to Invision Community using QIWI Kassa - a popular payment service in CIS countries.Free
 -
Stripe Checkout is a prebuilt, hosted payment page optimized for conversion. Whether you offer one-time purchases, use Checkout to easily and securely accept payments online. Features Stripe Tax to automate tax calculation and collection or define applicable tax rates. Toggle Tax behavior - disabled/inclusive/exclusive. Dispute processing. Refunds/partial refunds supporting. Ability to ban a member after a refund. Information Gateway only works if billing address collection is enabled. Payment methods Getting keys You must register in the merchant's account using the link: https://dashboard.stripe.com/register. After that go to the menu Developers > API keys and copy Publishable key and Secret key. Webhook setup You need to set up a webhook. Go to the webhooks page and click to the button + Add endpoint. Fill in the fields: Endpoint URL: https://YOUR_ADDRESS/index.php?app=stripecheckout&module=webhook&controller=webhook Select events to listen to: checkout.session.async_payment_failed checkout.session.async_payment_succeeded charge.dispute.closed charge.dispute.created charge.refunded checkout.session.completed And click to Add endpoint. After that, you can go to the settings of the created webhook and copy the secret key from the Signing secret setting, which must be specified in the settings in Invision Community. Gateway setup You must install the Stripe Checkout Gateway application from the market. Go to the ACP menu > Commerce > Payments > Settings > Payment Methods tab > Create new button and select Stripe Checkout. Fill the form with the data created earlier in the step above.
-
Stripe Checkout is a prebuilt, hosted payment page optimized for conversion. Whether you offer one-time purchases, use Checkout to easily and securely accept payments online. Features Stripe Tax to automate tax calculation and collection or define applicable tax rates. Toggle Tax behavior - disabled/inclusive/exclusive. Dispute processing. Refunds/partial refunds supporting. Ability to ban a member after a refund. Information Gateway only works if billing address collection is enabled. Payment methods Getting keys You must register in the merchant's account using the link: https://dashboard.stripe.com/register. After that go to the menu Developers > API keys and copy Publishable key and Secret key. Webhook setup You need to set up a webhook. Go to the webhooks page and click to the button + Add endpoint. Fill in the fields: Endpoint URL: https://YOUR_ADDRESS/index.php?app=stripecheckout&module=webhook&controller=webhook Select events to listen to: checkout.session.async_payment_failed checkout.session.async_payment_succeeded charge.dispute.closed charge.dispute.created charge.refunded checkout.session.completed And click to Add endpoint. After that, you can go to the settings of the created webhook and copy the secret key from the Signing secret setting, which must be specified in the settings in Invision Community. Gateway setup You must install the Stripe Checkout Gateway application from the market. Go to the ACP menu > Commerce > Payments > Settings > Payment Methods tab > Create new button and select Stripe Checkout. Fill the form with the data created earlier in the step above. View full article
-
Checkout.com - Process debit and credit card payments online, anywhere and access local payment methods through global payments platform. This gateway is a form of payment on the checkout.com side. To connect the gateway, you need to create a seller account on the site: https://www.checkout.com/get-test-account. Then you can enter to your dashboard. Getting the keys Once you have accessed the dashboard, you must create new API keys. Go to the menu Developers > Keys and click to Create new key button: Type of key: Public API key Allow any processing channel: No Manually select your channel Follow the same steps to create a private key. Webhook setup To install the webhook go to https://dashboard.sandbox.checkout.com/settings/notifications. Click o button + New Notification: Enter any name. Event selection: Gateway > Payment Approved. Webhook url: https://community/index.php?app=checkoutcom&module=webhook&controller=webhook Authorization header Key: Generate key Signature Key: Generate key Gateway setup Install the Checkout.com Payment Gateway app from market. Go to the ACP menu > Commerce > Payments > Settings > Payment Methods tab > Create new button and select Checkout.com. Fill the form with the data created earlier in the steps above. The payment form looks like this:
-
Checkout.com - Process debit and credit card payments online, anywhere and access local payment methods through global payments platform. This gateway is a form of payment on the checkout.com side. To connect the gateway, you need to create a seller account on the site: https://www.checkout.com/get-test-account. Then you can enter to your dashboard. Getting the keys Once you have accessed the dashboard, you must create new API keys. Go to the menu Developers > Keys and click to Create new key button: Type of key: Public API key Allow any processing channel: No Manually select your channel Follow the same steps to create a private key. Webhook setup To install the webhook go to https://dashboard.sandbox.checkout.com/settings/notifications. Click o button + New Notification: Enter any name. Event selection: Gateway > Payment Approved. Webhook url: https://community/index.php?app=checkoutcom&module=webhook&controller=webhook Authorization header Key: Generate key Signature Key: Generate key Gateway setup Install the Checkout.com Payment Gateway app from market. Go to the ACP menu > Commerce > Payments > Settings > Payment Methods tab > Create new button and select Checkout.com. Fill the form with the data created earlier in the steps above. The payment form looks like this: View full article
-
Enot.io Payment Gateway for invision Community To accept payments in the commerce application, you can use the Enot.io service. First you must register new account - https://enot.io/signup and create a new merchant, which will be available after moderation. After the merchant is approved, you can make settings. Go to your merchant settings and set the webhook URL: YOURCOMMUNITY.COM/index.php?app=enotio&module=enotio&controller=webhook Copy the secret and additional keys, you will need them to configure the gateway. Gateway installation Install the Enot.io Payment Gateway application in your community. Go to menu Commerce > Payments > Settings > Payment Methods tab > + Create new. Select Enot.io. Fill in the settings after copying them from your merchant settings. Save settings. Done!
-
Enot.io Payment Gateway for invision Community To accept payments in the commerce application, you can use the Enot.io service. First you must register new account - https://enot.io/signup and create a new merchant, which will be available after moderation. After the merchant is approved, you can make settings. Go to your merchant settings and set the webhook URL: YOURCOMMUNITY.COM/index.php?app=enotio&module=enotio&controller=webhook Copy the secret and additional keys, you will need them to configure the gateway. Gateway installation Install the Enot.io Payment Gateway application in your community. Go to menu Commerce > Payments > Settings > Payment Methods tab > + Create new. Select Enot.io. Fill in the settings after copying them from your merchant settings. Save settings. Done! View full article
-
BitPay Payment Gateway make accepting blockchain payments fast and reliable. With blockchain payments, there's no sensitive customer information to collect and store, and there are no cards to charge. Customers simply send cryptocurrencies (like Bitcoin, Ether, or Ripple) from their computer or mobile device directly to a payment address. Once received, BitPay converts the cryptocurrencies to your preferred currency and adds the full amount of the payment to your next BitPay account settlement. Funds are then deposited to your bank account or cryptocurrency wallet. Registration To test payments, you must register and use the API key in the test mirror - https://test.bitpay.com/dashboard/signup or you can use the working site right away - https://bitpay.com/dashboard/signup. After registering, you will be asked to fill in information about yourself and your store, as well as go through identification, which will take about 5 business days (you don't need to pass identification for the test environment). After registration, you need to create a new API key - go to the menu Payment Tools > API Tokens > + Add New Token. Create a new token and copy it. BitPay Payment Gateway installation Install the app BitPay Payment Gateway for Invision Community. In the settings of the payment method, specify the API key received earlier.
-
BitPay Payment Gateway make accepting blockchain payments fast and reliable. With blockchain payments, there's no sensitive customer information to collect and store, and there are no cards to charge. Customers simply send cryptocurrencies (like Bitcoin, Ether, or Ripple) from their computer or mobile device directly to a payment address. Once received, BitPay converts the cryptocurrencies to your preferred currency and adds the full amount of the payment to your next BitPay account settlement. Funds are then deposited to your bank account or cryptocurrency wallet. Registration To test payments, you must register and use the API key in the test mirror - https://test.bitpay.com/dashboard/signup or you can use the working site right away - https://bitpay.com/dashboard/signup. After registering, you will be asked to fill in information about yourself and your store, as well as go through identification, which will take about 5 business days (you don't need to pass identification for the test environment). After registration, you need to create a new API key - go to the menu Payment Tools > API Tokens > + Add New Token. Create a new token and copy it. BitPay Payment Gateway installation Install the app BitPay Payment Gateway for Invision Community. In the settings of the payment method, specify the API key received earlier. View full article
-
MultiSafepay - Over 30 payment methods. MultiSafepay relies on it’s own infrastructure rather than using multiple third parties. Your transactions are handled entirely by MultiSafepay, from the moment that the customer pays to the settlement on your balance. This ensures higher availability and resilience, faster processing, and optimizes your conversion. Without any other third parties, MultiSafepay ensures faster settlement of funds. Registration on MultiSafepay You must register in the merchant's account, by the link https://merchant.multisafepay.com/signup, here you can first test the payment solution by selecting a test account (link for register test account: https://testmerchant.multisafepay.com/signup). After registration, you will be able to enter your merchant account: Now you need to add your store, follow the menu Integrations > SItes > Add new site, fill in the required fields and save the form. Now open the settings of the added site. Here you need to activate payment methods and copy the API key. Installing the gateway application Download the application from the link and install it on Invision Community. Go to menu Commerce > Payments > Settings > Payment Methods > + Create new. Select MultiSafepay and paste the API key copied from the first step and save the form. The payment method is set.
-
MultiSafepay - Over 30 payment methods. MultiSafepay relies on it’s own infrastructure rather than using multiple third parties. Your transactions are handled entirely by MultiSafepay, from the moment that the customer pays to the settlement on your balance. This ensures higher availability and resilience, faster processing, and optimizes your conversion. Without any other third parties, MultiSafepay ensures faster settlement of funds. Registration on MultiSafepay You must register in the merchant's account, by the link https://merchant.multisafepay.com/signup, here you can first test the payment solution by selecting a test account (link for register test account: https://testmerchant.multisafepay.com/signup). After registration, you will be able to enter your merchant account: Now you need to add your store, follow the menu Integrations > SItes > Add new site, fill in the required fields and save the form. Now open the settings of the added site. Here you need to activate payment methods and copy the API key. Installing the gateway application Download the application from the link and install it on Invision Community. Go to menu Commerce > Payments > Settings > Payment Methods > + Create new. Select MultiSafepay and paste the API key copied from the first step and save the form. The payment method is set. View full article
-
You can connect your CardGate account to the Commerce app in Invision Community! If you don't have an account yet, you can create one using this link: https://www.cardgate.com/en/sign-up/. CardGate - Safe and simple payments for your customers. Install application For the gateway to work correctly, you will need to install the application CardGate Payment Gateway via Admin CP of your community. Now you need to go to the menu Commerce > Payments > Settings > Payment Methods tab > Create new button and select CardGate Payment Gateway. In the next step, you will need to enter your CardGate details. Client CP: Payment page: Registration You need to register in the account using the link - https://www.dialxs.com/apply-for-an-account/. After authorization, you can switch to the site https://staging.curopayments.net/ and click on the menu on the left Sites > + Add, after adding a site, go to site settings and set the following parameters: Callback URL: https://yourcommunity/?app=cardgate&module=front&controller=callback Success URL: https://yourcommunity/?app=cardgate&module=front&controller=callback&cancel=1 Pending URL: https://yourcommunity/?app=cardgate&module=front&controller=callback&pending=1 Failure URL: https://yourcommunity/?app=cardgate&module=front&controller=callback&fail=1 On this page you will also need copy Site ID and Site Id. Merchant ID - At the very top in the right corner you will find this option. API Key - Select API from the menu on the left.
-
You can connect your CardGate account to the Commerce app in Invision Community! If you don't have an account yet, you can create one using this link: https://www.cardgate.com/en/sign-up/. CardGate - Safe and simple payments for your customers. Install application For the gateway to work correctly, you will need to install the application CardGate Payment Gateway via Admin CP of your community. Now you need to go to the menu Commerce > Payments > Settings > Payment Methods tab > Create new button and select CardGate Payment Gateway. In the next step, you will need to enter your CardGate details. Client CP: Payment page: Registration You need to register in the account using the link - https://www.dialxs.com/apply-for-an-account/. After authorization, you can switch to the site https://staging.curopayments.net/ and click on the menu on the left Sites > + Add, after adding a site, go to site settings and set the following parameters: Callback URL: https://yourcommunity/?app=cardgate&module=front&controller=callback Success URL: https://yourcommunity/?app=cardgate&module=front&controller=callback&cancel=1 Pending URL: https://yourcommunity/?app=cardgate&module=front&controller=callback&pending=1 Failure URL: https://yourcommunity/?app=cardgate&module=front&controller=callback&fail=1 On this page you will also need copy Site ID and Site Id. Merchant ID - At the very top in the right corner you will find this option. API Key - Select API from the menu on the left. View full article
-
The Xbox Live Integration app allows your users to attach their Xbox Live game data to their profile in Invision Community. Also, users can register and log in to the community using a Xbox Live account. App registration First you need to register the application in the Microsoft Azure service: https://portal.azure.com/#view/Microsoft_AAD_RegisteredApps/ApplicationsListBlade Click to + New registration button, enter an arbitrary name and select an application type: Personal Microsoft accounts only and then click to Register. Now go to the application and select Authentication from the menu on the left and click to Add a platform. Select application type: Web and add Redirect URIs: https://COMMUNITYADDRESS.com/oauth/callback/ Find the Allow public client flows setting below and toggle it to Yes and save platform configuration. Now go to API permissions menu and add New permission - Microsoft Graph: User.Read Now the settings are completed. Install Integration You need to download the application from the link and install it in Invision Community. Go to the ACP > System > Settings > Login & Registration > + Create New. Client Identifier and Client Secret must be obtained on the Overview tab (portal.azure.com). Save the settings, now the user who linked the Xbox Live account will have a tab in the profile with his game information.
-
The Xbox Live Integration app allows your users to attach their Xbox Live game data to their profile in Invision Community. Also, users can register and log in to the community using a Xbox Live account. App registration First you need to register the application in the Microsoft Azure service: https://portal.azure.com/#view/Microsoft_AAD_RegisteredApps/ApplicationsListBlade Click to + New registration button, enter an arbitrary name and select an application type: Personal Microsoft accounts only and then click to Register. Now go to the application and select Authentication from the menu on the left and click to Add a platform. Select application type: Web and add Redirect URIs: https://COMMUNITYADDRESS.com/oauth/callback/ Find the Allow public client flows setting below and toggle it to Yes and save platform configuration. Now go to API permissions menu and add New permission - Microsoft Graph: User.Read Now the settings are completed. Install Integration You need to download the application from the link and install it in Invision Community. Go to the ACP > System > Settings > Login & Registration > + Create New. Client Identifier and Client Secret must be obtained on the Overview tab (portal.azure.com). Save the settings, now the user who linked the Xbox Live account will have a tab in the profile with his game information. View full article
-
You can set up verification of users in your community on Invision Community, additional to registration process. You can verify users manually or using third-party services. To verify users, you need to install the Verification application for Invision Community. Application settings After installing the application, you need to make basic settings: go to ACP > System > Verification > Settings. Here you can select the verification type, which groups can verify users, which groups are required to verify to continue using the community, and whether users can delete their pending verification request. On the Promotion tab, you can specify which groups to promote the user to after verification, and on the Icon tab, you can upload an icon that will be displayed next to the user's nickname on the forum. In addition to manual verification, you can use verification through specialized services: Verifai.com Sumsub.com WithPersona.com ShuftiPro.com Manual verification In the user settings, a form for uploading a photo and a description that you specified in the application settings will appear. After sending the photo, the verification request will go to the moderator panel for approval, the user will be shown this screen: The moderator has access to the interface for viewing requests and approving them in the moderator panel: Viewing a request in the moderator panel: After a request is approved, the user receives a notification that his verification request has been accepted.
-
You can set up verification of users in your community on Invision Community, additional to registration process. You can verify users manually or using third-party services. To verify users, you need to install the Verification application for Invision Community. Application settings After installing the application, you need to make basic settings: go to ACP > System > Verification > Settings. Here you can select the verification type, which groups can verify users, which groups are required to verify to continue using the community, and whether users can delete their pending verification request. On the Promotion tab, you can specify which groups to promote the user to after verification, and on the Icon tab, you can upload an icon that will be displayed next to the user's nickname on the forum. In addition to manual verification, you can use verification through specialized services: Verifai.com Sumsub.com WithPersona.com ShuftiPro.com Manual verification In the user settings, a form for uploading a photo and a description that you specified in the application settings will appear. After sending the photo, the verification request will go to the moderator panel for approval, the user will be shown this screen: The moderator has access to the interface for viewing requests and approving them in the moderator panel: Viewing a request in the moderator panel: After a request is approved, the user receives a notification that his verification request has been accepted. View full article
-
Verifai.com offers seamless identity verification solutions for every use case. Easy to implement and customize, while taking the highest privacy and security standards in mind. Integrates effortlessly into mobile and web applications. You can verify users registered in your community through the service Verifai.com. You need to access the control panel from the link https://dashboard.verifai.com/account/register/. After that, on the dashboard https://dashboard.verifai.com/ you must choose the solution - Web ID verification SDK (SaaS). Now click the Add implementation button and choose Add Web SDK implementation. You need to purchase the Verification app for Invision Community, install it and make the following settings: Community setting Go to ACP > System > Verification > Settings and select Verification type - Verifai. Fill in the fields: Verifai secret API token: on your application page (https://dashboard.verifai.com/apps/). Verifai Webhook Secret: see webhook setup below Verifai Description: The description that will be displayed to the user on the verification page. Save you settings. Webhook setting up Go to your application (Manage solution) on Verifai dahsboard and in the menu on the left, click the button Webhooks (if you do not have such a menu, write to support). Add new webhook with url: https://YOURCOMMUNITY/index.php?app=verification&module=request&controller=verifai. Copy the secret key and paste it into the settings in Invision Community.
-
Verifai.com offers seamless identity verification solutions for every use case. Easy to implement and customize, while taking the highest privacy and security standards in mind. Integrates effortlessly into mobile and web applications. You can verify users registered in your community through the service Verifai.com. You need to access the control panel from the link https://dashboard.verifai.com/account/register/. After that, on the dashboard https://dashboard.verifai.com/ you must choose the solution - Web ID verification SDK (SaaS). Now click the Add implementation button and choose Add Web SDK implementation. You need to purchase the Verification app for Invision Community, install it and make the following settings: Community setting Go to ACP > System > Verification > Settings and select Verification type - Verifai. Fill in the fields: Verifai secret API token: on your application page (https://dashboard.verifai.com/apps/). Verifai Webhook Secret: see webhook setup below Verifai Description: The description that will be displayed to the user on the verification page. Save you settings. Webhook setting up Go to your application (Manage solution) on Verifai dahsboard and in the menu on the left, click the button Webhooks (if you do not have such a menu, write to support). Add new webhook with url: https://YOURCOMMUNITY/index.php?app=verification&module=request&controller=verifai. Copy the secret key and paste it into the settings in Invision Community. View full article
-
Sumsub.com - a seamless solution for onboarding any number of users worldwide, powered by a verification engine that supports IDs from 220+ countries and territories. You can verify users registered in your community through the service Sumsub.com. You need to go through the registration process to gain access to the control panel from the link https://cockpit.sumsub.com/checkus#/signUp You need to purchase the Verification app for Invision Community, install it and make the following settings: Sumsub Token - you can get a token from the link - https://cockpit.sumsub.com/checkus#/devSpace/appTokens > Generate app token. Sumsub Secret Key - when generating Sumsub Token, you will also receive Secret Key, which also needs to be copied. Level Name - enter here the name of the required verification level - https://cockpit.sumsub.com/checkus#/sdkIntegrations/levels/individual. After saving the settings, the user will be able to pass verification in the profile settings, the process looks like this: Webhook setting up Go to page https://cockpit.sumsub.com/checkus#/devSpace/webhooks and click to the button Create webhook: Receiver: HTTP address Target: https://YOURCOMMUNITY/?app=verification&module=request&controller=sumsub Type: select all types Active: Yes Save the webhook! Setup completed!